win8手动VPN设置教程
2017-05-27
你还在为不知道win8手动VPN设置教程而不知所措么?下面来是小编为大家收集的win8手动VPN设置教程,欢迎大家阅读:
win8手动VPN设置教程
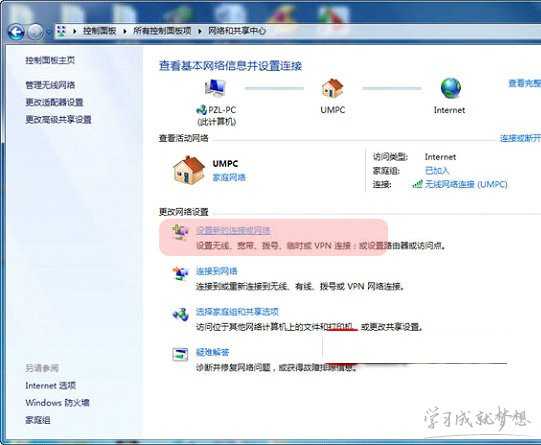
1. 第一步:依次点击 开始->控制面板->网络和共享中心->设置新的连接或网络
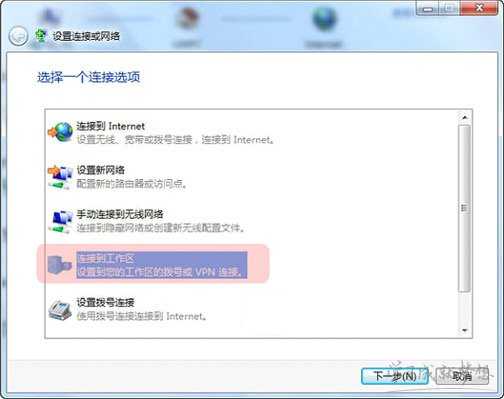
2. 第二步:选择“连接到工作区”,点击“下一步”;
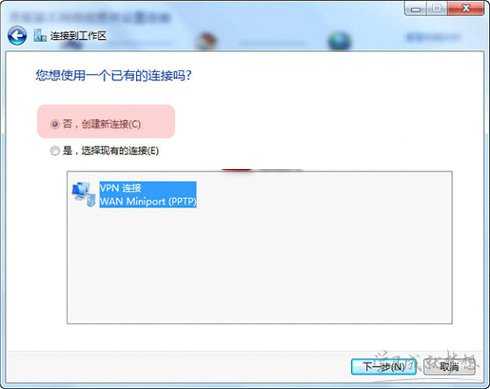
3. 第三步:如果已经存在其他连接,则在这一步选择“否,创建新连接”;如果没有,则这一步将被跳过;
4. 第四步:选择“使用我的Internet连接(VPN)”,点击“下一步”;

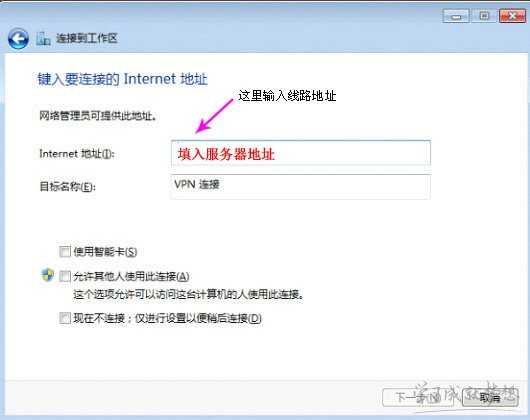
5. 第五步:在“Internet地址”栏填写服务器线路地址(点击这里查看服务器线路地址)。“目标名称”填写“shayu”,点击下一步;
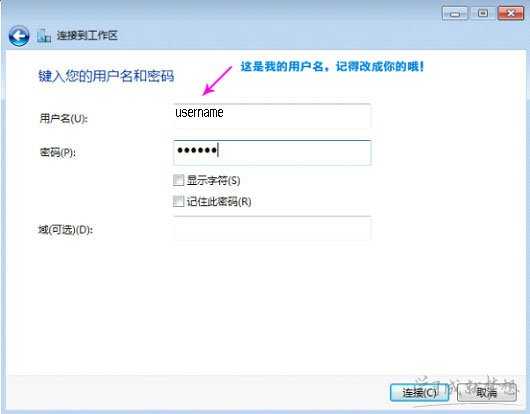
6. 第六步:填写你的用户名和密码,点击“连接”,如您还未注册,请点击立即注册
7. 第七步:链接成功后再桌面右下角会有提示。

看了“win8手动VPN设置教程”还想看:
1.Windows8教程
2.win8系统如何给VPN设置属性
3.win8双显卡三种设置教程
4.windows 8怎样设置vpn的连接
5.Win8如何建立VPN连接操作教程