wps文档如何添加饼图
2017-01-03
相关话题
你知道怎么在wps文档添加饼图吗?下面小编就为你介绍wps文档如何添加饼图的方法啦!
wps文档添加饼图的方法:
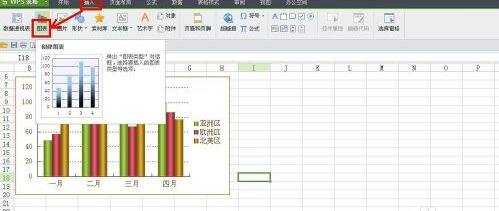
打开WPS文字软件,单击菜单栏“插入”——图表。

2 此时自动打开WPS表格软件,并在WPS表格中有了一个柱状图。

3 在WPS表格软件中选定刚才插入的柱状图,单击菜单栏“插入”——图表。
弹出“图表类型”对话框,找到“饼图”并单击右面的下箭头。
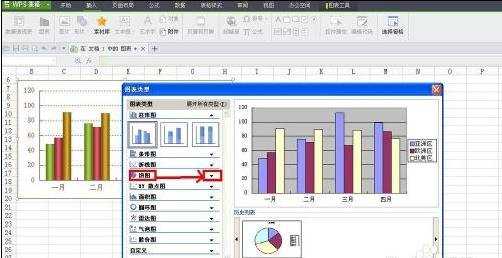
在展开的饼图类型中选择一种饼图类型,并单击。

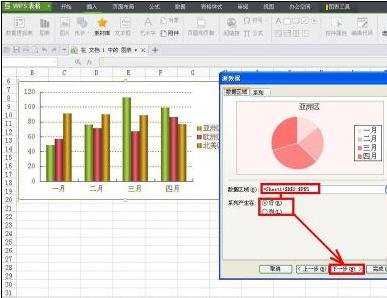
在出现的配色方案中选择一种自己喜欢的配色方案,如图所示,单击“下一步”。

在“源数据”对话框中选择好数据区域,并设置好系列产生在行还是列,并单击“下一步”。
在弹出的“图表标题”对话框中选择“标题选项卡”,填充好标题。

切换到“图例”选项卡,选择好标题位置。
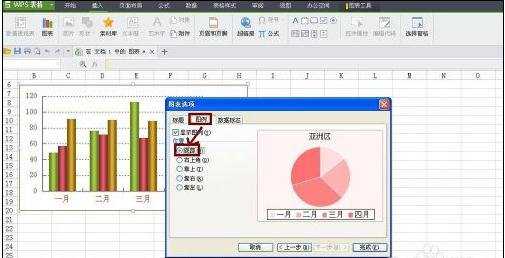
切换到“数据标志”选项卡,选择合适的数据标签,单击“完成”按钮。

现在在WPS表格中就出现了饼状图,如图所示。

现在回到WPS文字软件,把原来的柱状图删掉。

然后把WPS表格中的饼状图粘贴到WPS文字软件当中即可。
