如何使用ppt制作球体
2016-12-24
相关话题
使用ppt制作球体你知道怎么做呢?下面小编就为你提供如何使用ppt制作球体的方法啦!
使用ppt制作球体的方法:
绘制圆形:
打开PPT软件,单击菜单栏“插入”——形状——椭圆。
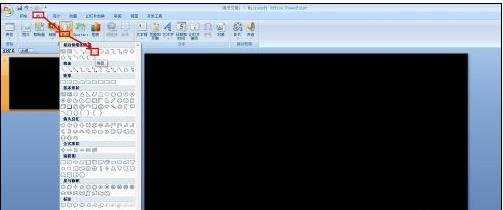
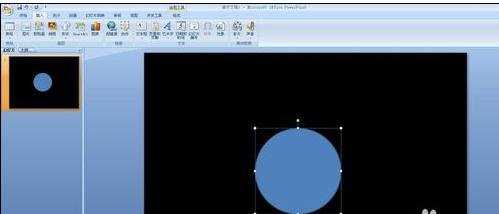
按住“Shift”键,按住鼠标左键在画布上画出一个圆形。
制作球体:
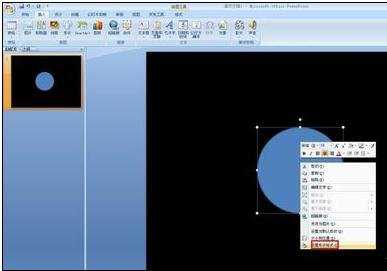
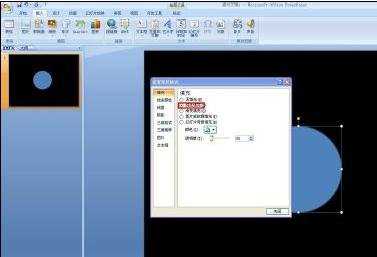
在刚才制作的圆形上面单击右键选择“设置形状格式”。
在弹出的“设置形状格式”对话框中切换到“填充”选项卡,选择“纯色填充”。
在弹出的“设置形状格式”对话框中切换到“三维格式”选项卡,调节“顶端”和“底端”的宽度和高度,如图所示。
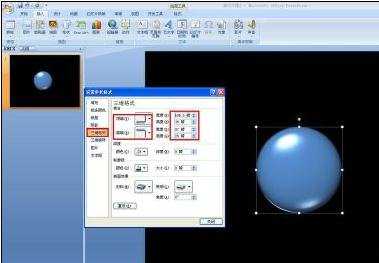
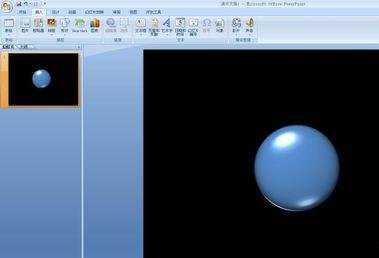
现在关闭刚才的对话框,就可以看到制作好的球体了。