Excel中2010版进行删除图片的操作技巧
2017-06-16
相关话题
现在使用Word 2010和Excel 2010的人越来越多,但其中的使用方法和诀窍需要在实践中慢慢体会和总结,有时一项很简单、快捷的操作却能给办公人员带来工作效率极大的提升,今天,小编就教大家在Excel中2010版进行删除图片的操作技巧。
Excel中2010版进行删除图片的操作步骤
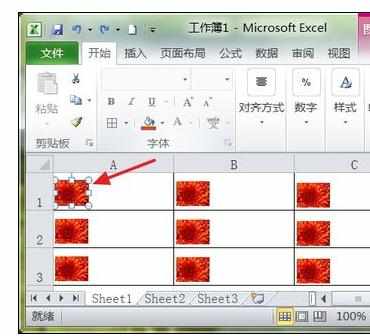
用鼠标左键点击下图红色箭头所指的图片。
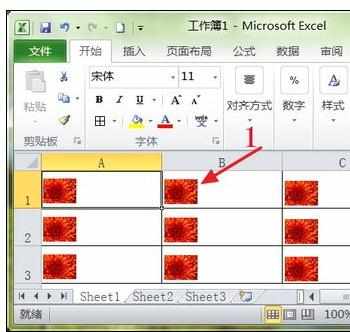
当图片变成如下红色箭头所指的格式时,再按下键盘上的“Delete”键。
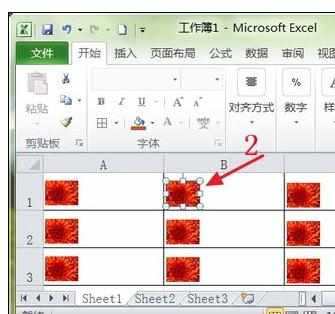
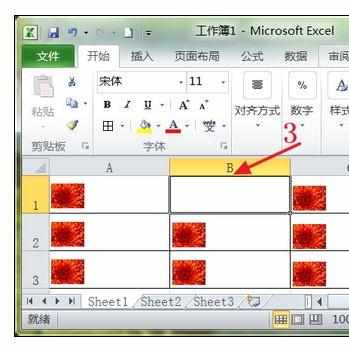
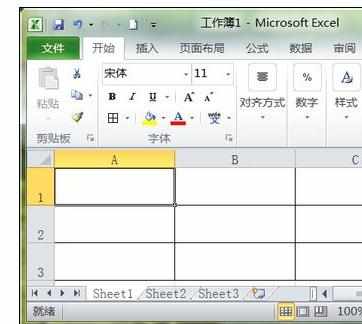
如下图所示,单元格中的图片被删除了。以此类推,可以删除其它单元格中的图片。
用鼠标左键点击下图红色箭头所指的图片。
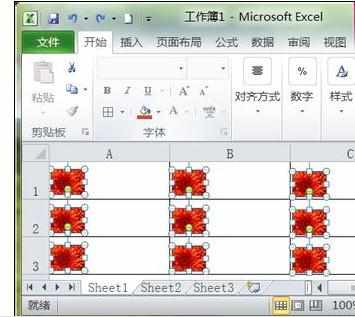
然后再同时按下键盘上的“Ctrl+A”键,或者先按下“Ctrl”键,然后再用鼠标左键选择每个单元格中的图片,最后所有单元格中的图片都变成了如下图所示的格式。
接着,再按下键盘上的“Delete”键,这时所有单元格中的图片都被删除了,如下图所示。
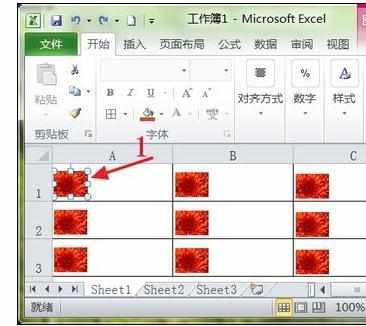
用鼠标左键点击下图红色箭头所指的图片。
然后再按下键盘上的“F5”键,在出现的界面上点击“定位条件(S)”按钮。
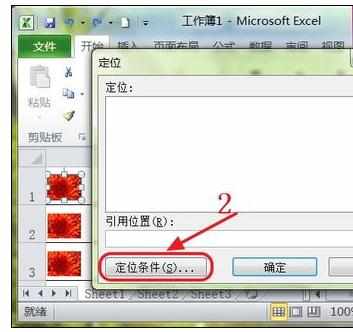
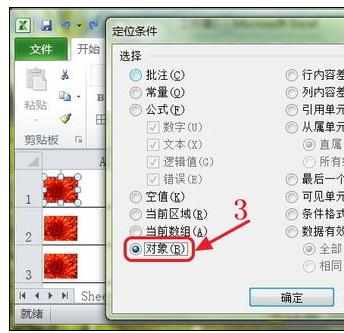
在出现的界面上点击下图红色箭头所指的“对象(B)”。
接着点击下图红色箭头所指的“确定”按钮。
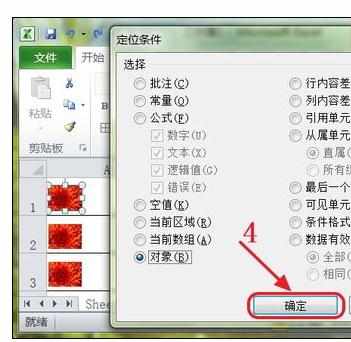
然后所有单元格中的图片都变成了如下图所示的格式。
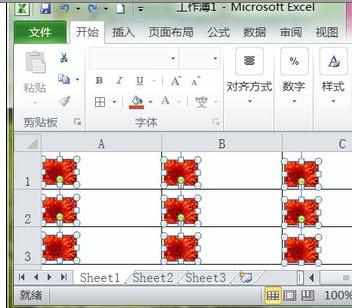
接着,再按下键盘上的“Delete”键,这时所有单元格中的图片就都删除了,如下图所示。